
Overview:
File transfer requires 2 or more computers to communicate with each other. The method they use to communicate is called a file transfer protocol. Secure protocols encrypt the channel that files are transferred over so that if someone intercepts the files, they can’t read them. Insecure protocols don’t encrypt the channel, which means anyone can intercept and read the files. This is especially a problem when files contain confidential information like social security numbers, credit card numbers, etc.
While HTTP and FTP are vulnerable protocols, SFTP, HTTPS, and FTPS are secure ones.
In this demonstration, the Linux system will have the SFTP server enabled, and all files will be stored on Azure file storage’s cloud storage using the NFS protocol.
Azure File Share:
The industry-standard Server Message Block (SMB), Network File System (NFS), and Azure Files REST APIs are all available for accessing the fully managed file shares that Azure Files provides in the cloud. Both cloud and on-premises implementations can concurrently mount Azure file shares. Access to SMB Azure file shares is available from clients running Windows, Linux, and macOS. Linux or macOS clients can access NFS Azure file shares. Additionally, Azure File Sync can be used to capture SMB Azure file shares on Windows servers for quick access close to where the data is being consumed.
NFS file shares in Azure Files:
For mounting Azure file shares, Azure Files provides two industry-standard file system protocols: the Server Message Block (SMB) protocol and the Network File System (NFS). You can choose the protocol that is most appropriate for your workload. Although you can build SMB and NFS file shares inside the same storage account, Azure file shares do not permit accessing a single Azure file share with both the SMB and NFS protocols. Enterprise-grade file shares that can scale up to match your storage demands are available with Azure Files, and thousands of clients can access them at once.
Prerequisites:
- Azure subscription
- Azure CLI
- Red Hat server
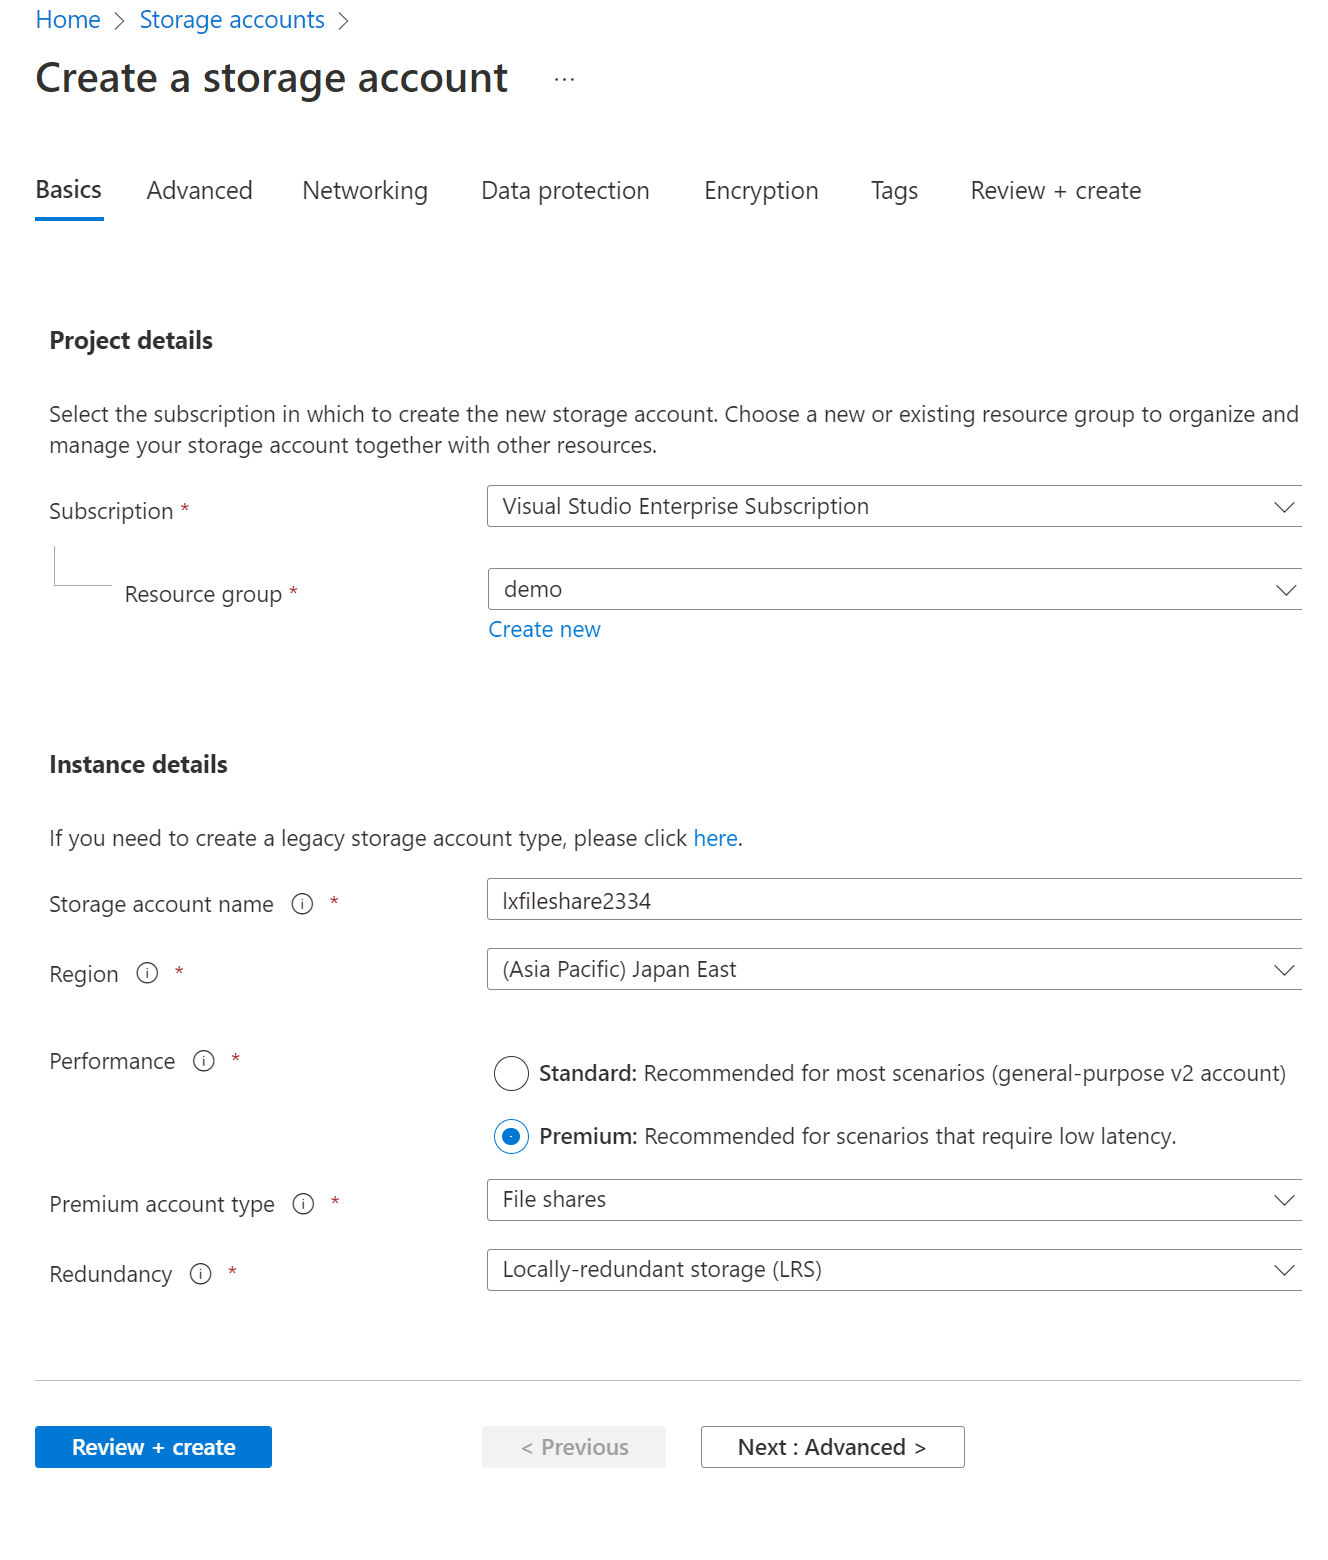
Create Azure Storage Account:
As NFS is only available in premium tires, we need an Azure premium file share service.
- Login on Azure Portal
- Search storage account
- Click on the create button
- Select the resource group, add storage account name
- Select Premium performance
- Premium account type should be File Share
- Redundancy you can select as per the data availability requirement
- click the network tab, then choose to utilize a private endpoint and turn off public access.
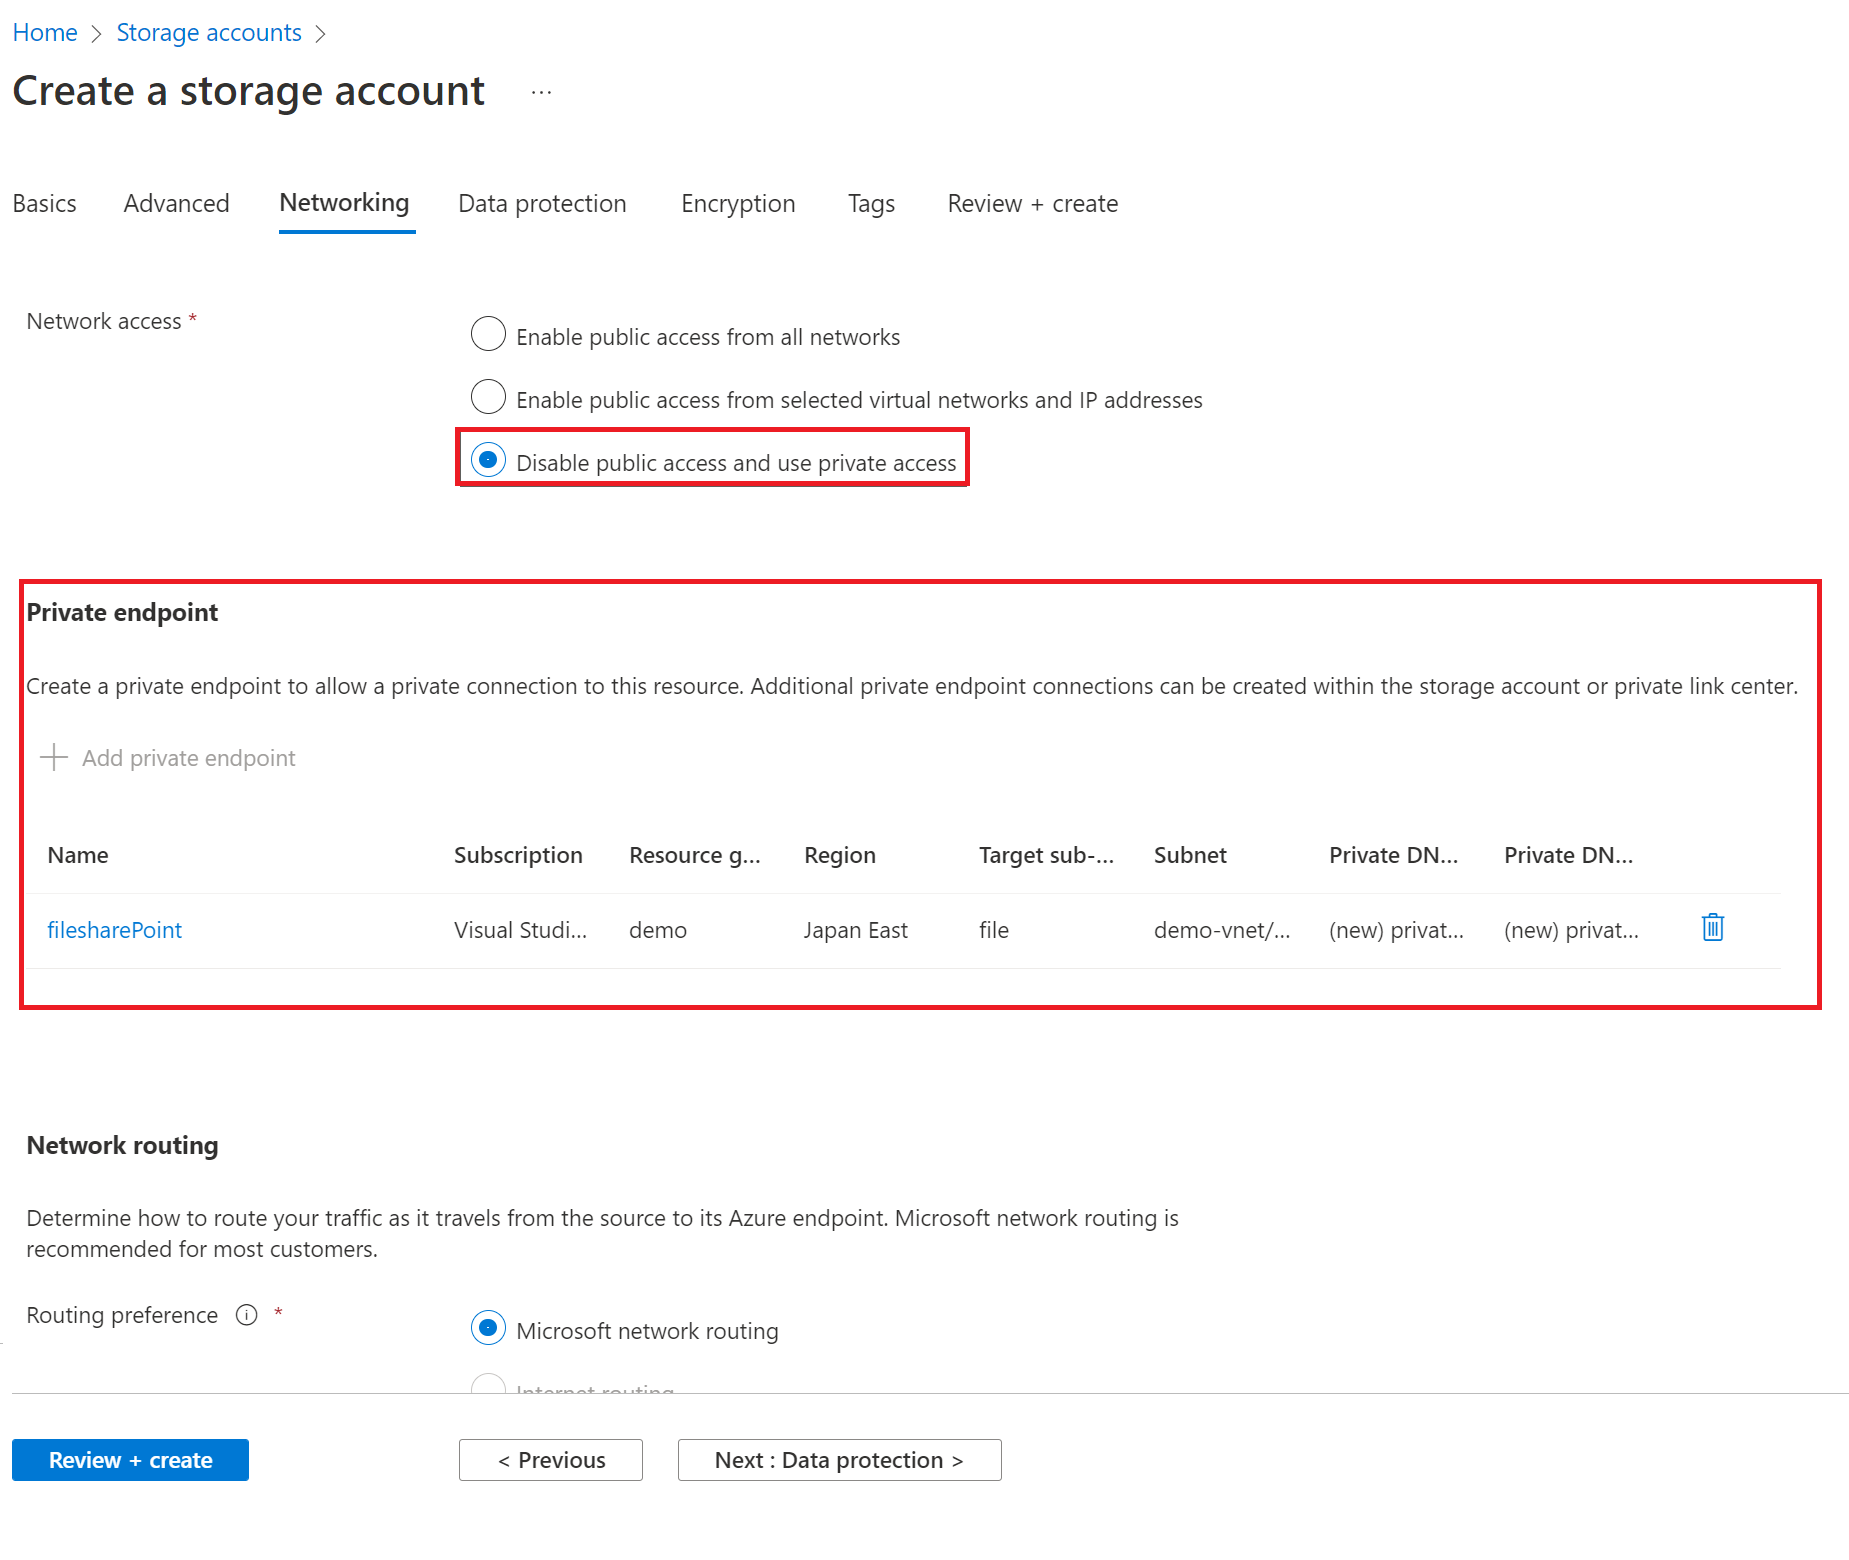
- create the private end point for the storage account, make sure your Red Hat server should be connected with the same VNet
- The other configuration should be default
Create NFS File share:
Once storage account is created now, we have to create a NFS file share and need to disable the secure transfer required configuration.
- Open storage account, which we have deployed
- Select file share
- you can see + File share Icon, clock on the icon
- Now enter the file share name, capacity.
- The Protocol should be NFS.
- Select no root squash
- click on the create button

It created a file share with NFS protocol after the creation comes back on the overview dashboard and click on configuration and disabled the secure transfer require.
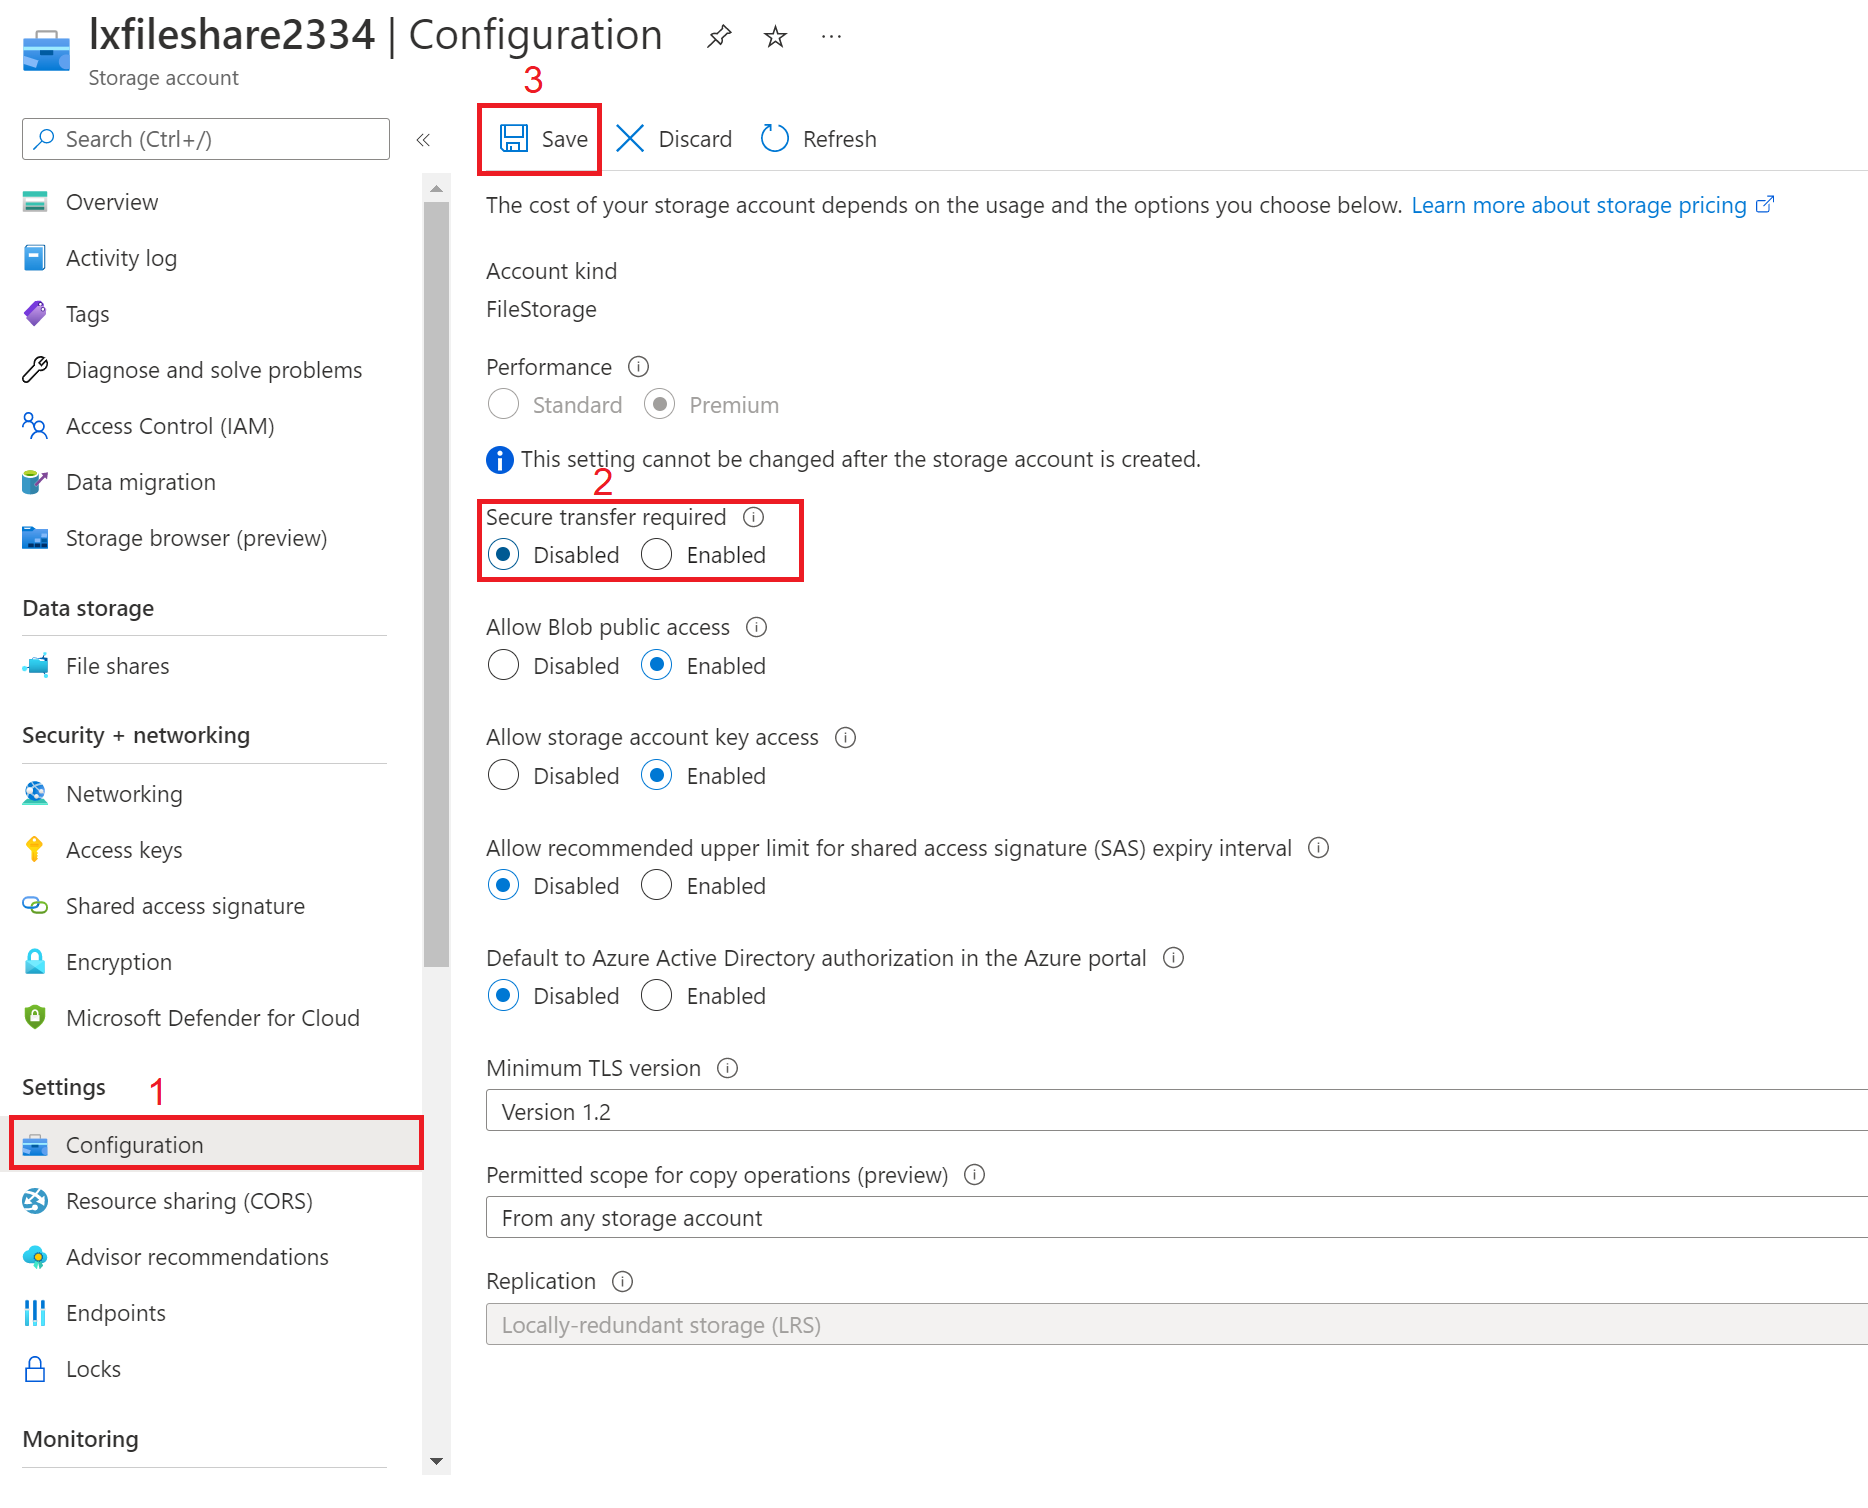
Here we are done of all the File share configuration.
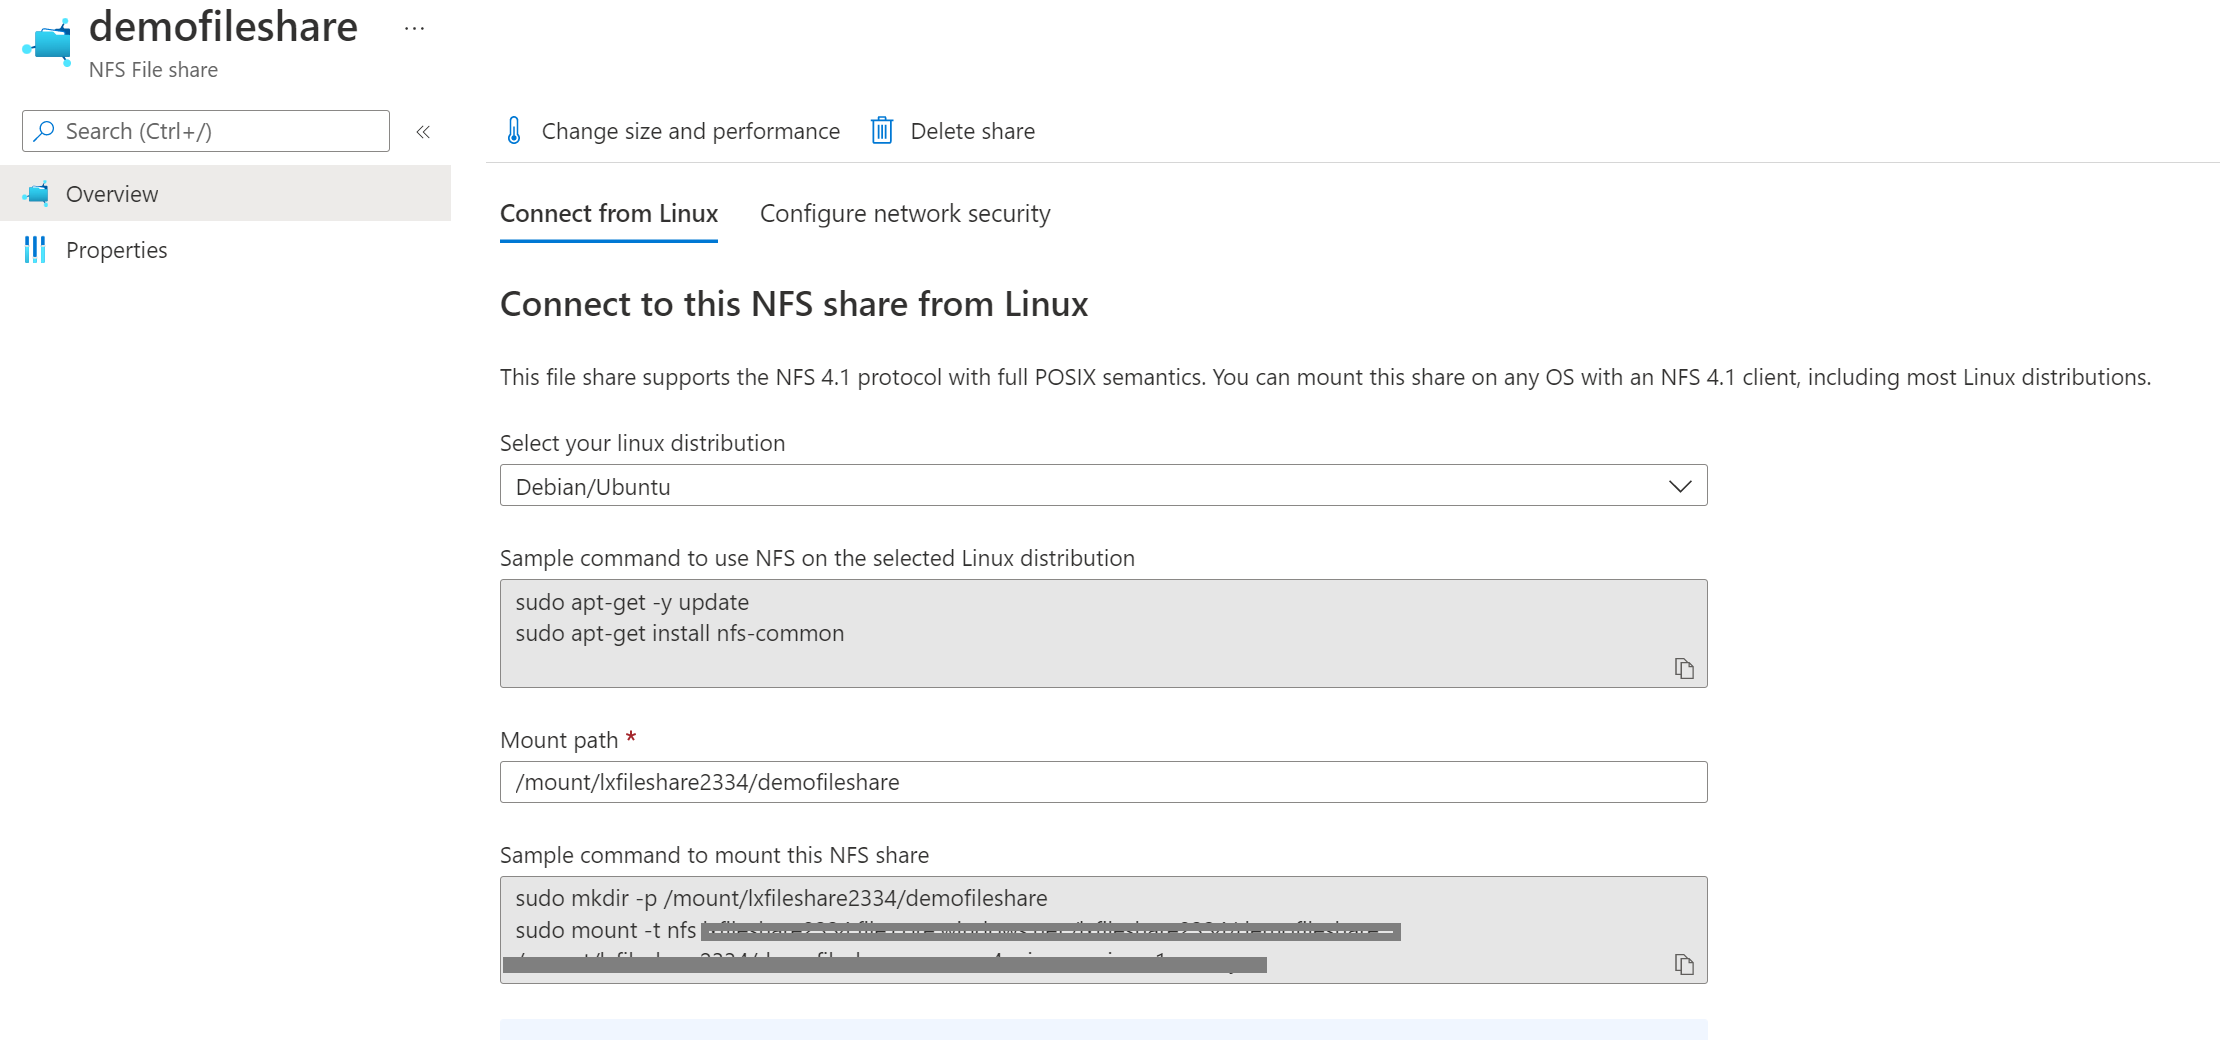
The mount URL you get from the Azure storage account->File shares->Click on the file share->Overview on the section you will get the URL
Configure the Red Hat server:
The File share storage requires mounting in the Red hat server as well as we are creating a user and the user group who can access the SFTP server. This is the list of commands which you can follow for the server configuration.
It's enabled the super user mode and add the packages
sudo su
yum update
yum install nfs-utils

Creating the mount directory and mounting the NFS drive
mkdir -p /mount/lxfileshare2334/demofileshare
mount -t nfs lxfileshare2334.file.core.windows.net:/lxfileshare2334/demofileshare /mount/lxfileshare2334/demofileshare -o vers=4,minorversion=1,sec=sys

Adding the User and mapping the user with group and path
useradd -m -d /mount/lxfileshare2334/demofileshare/username username
passwd Username
groupadd sftpusers
usermod -aG sftpusers user1
chown root:root /mnt/lxmount
chmod 755 /mount/lxfileshare2334/demofileshare
chown user1:sftpusers /mount/lxfileshare2334/demofileshare/username/opt

Enabling the user path
nano /etc/ssh/sshd_config
Match Group sftpusers
	ForceCommand internal-sftp
	PasswordAuthentication yes
	ChrootDirectory /mnt/lxmount/%u
	PermitTunnel no
	AllowAgentForwarding no
	AllowTcpForwarding no

Restarting the ssh service
systemctl restart sshd
After configuring it for the SFTP server, you can access the server using the username and password. I hope this post is useful for setting up your SFTP server.